Woodworking: Disassemblable Desk
August 2019
I recently started a new job at Amazon which will allow me to work from home a day or two a week. That will require a space to actually work from, so I decided to take some of the time between leaving Booz Allen and starting at Amazon to build a desk.
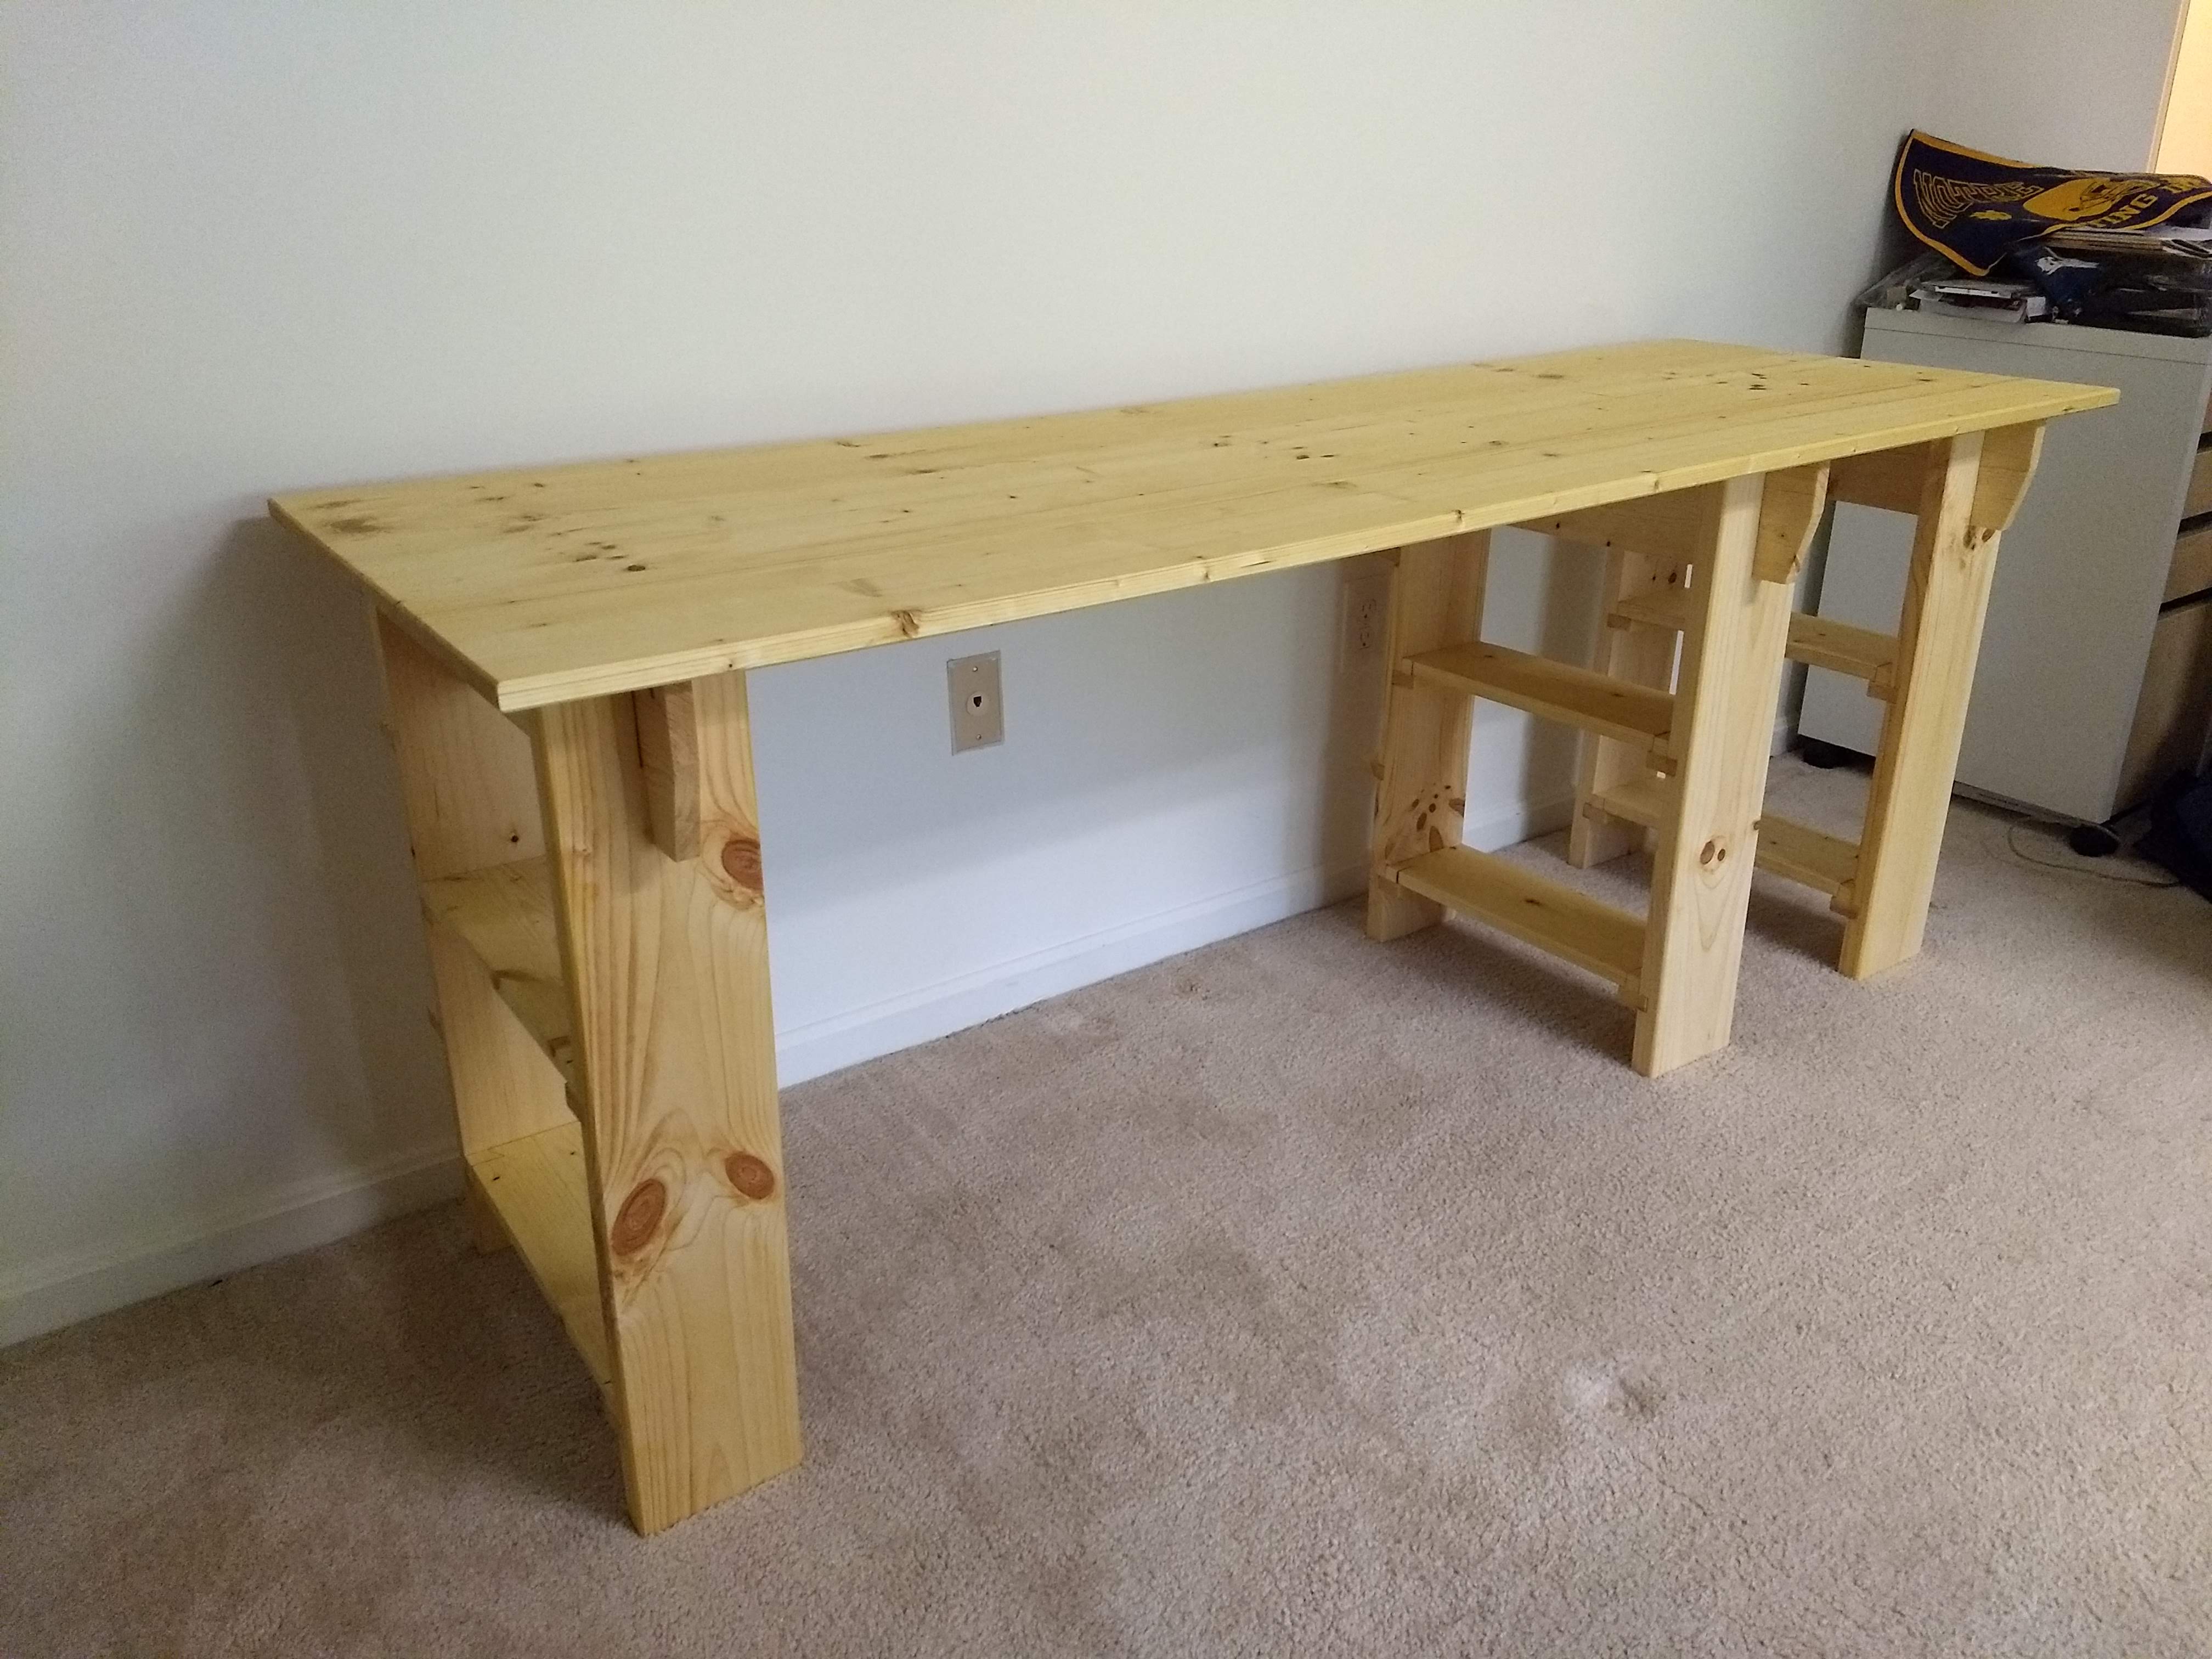
I've had several desks over the years, and always end up leaving them behind when I move. One of my goals when designing this was to come up with something that could be completely dissassembled and brought with me. I also wanted it to be pretty big. I need to spread papers, notebooks, computer(s), books, etc. out around me. The final dimensions for my build we 2' by 6', which is working out nicely thus far. Finally, I wanted to use no metal fasteners to hold everything together, because (a) it's a good challenge, (b) they can be expensive, (c) they can restrict the space of design options, and (d) they make it difficult to deal with seasonal wood movement that results from Chesapeake humidity.
Speaking of expense, part of Amazon's origin story is that their first desks were built from doors that Bezos got from Home Depot because that was cheaper than buying real desks. I honestly don't know how that is possible, since doors at retail price are more expensive than getting regular sheet goods to use as the tops, but whatever. In the spirit of the original Door Desk, I wanted to keep the costs for this project down. (Also because I have better things to spend money on, of course.) I used pretty cheap pine and a spruce edged-glued panel from Lowes. It's not the prettiest thing, but all-told the materials cost was about $80. For contrast, the cheapest Ikea desk costs $50, is one third the size, and has no storage.
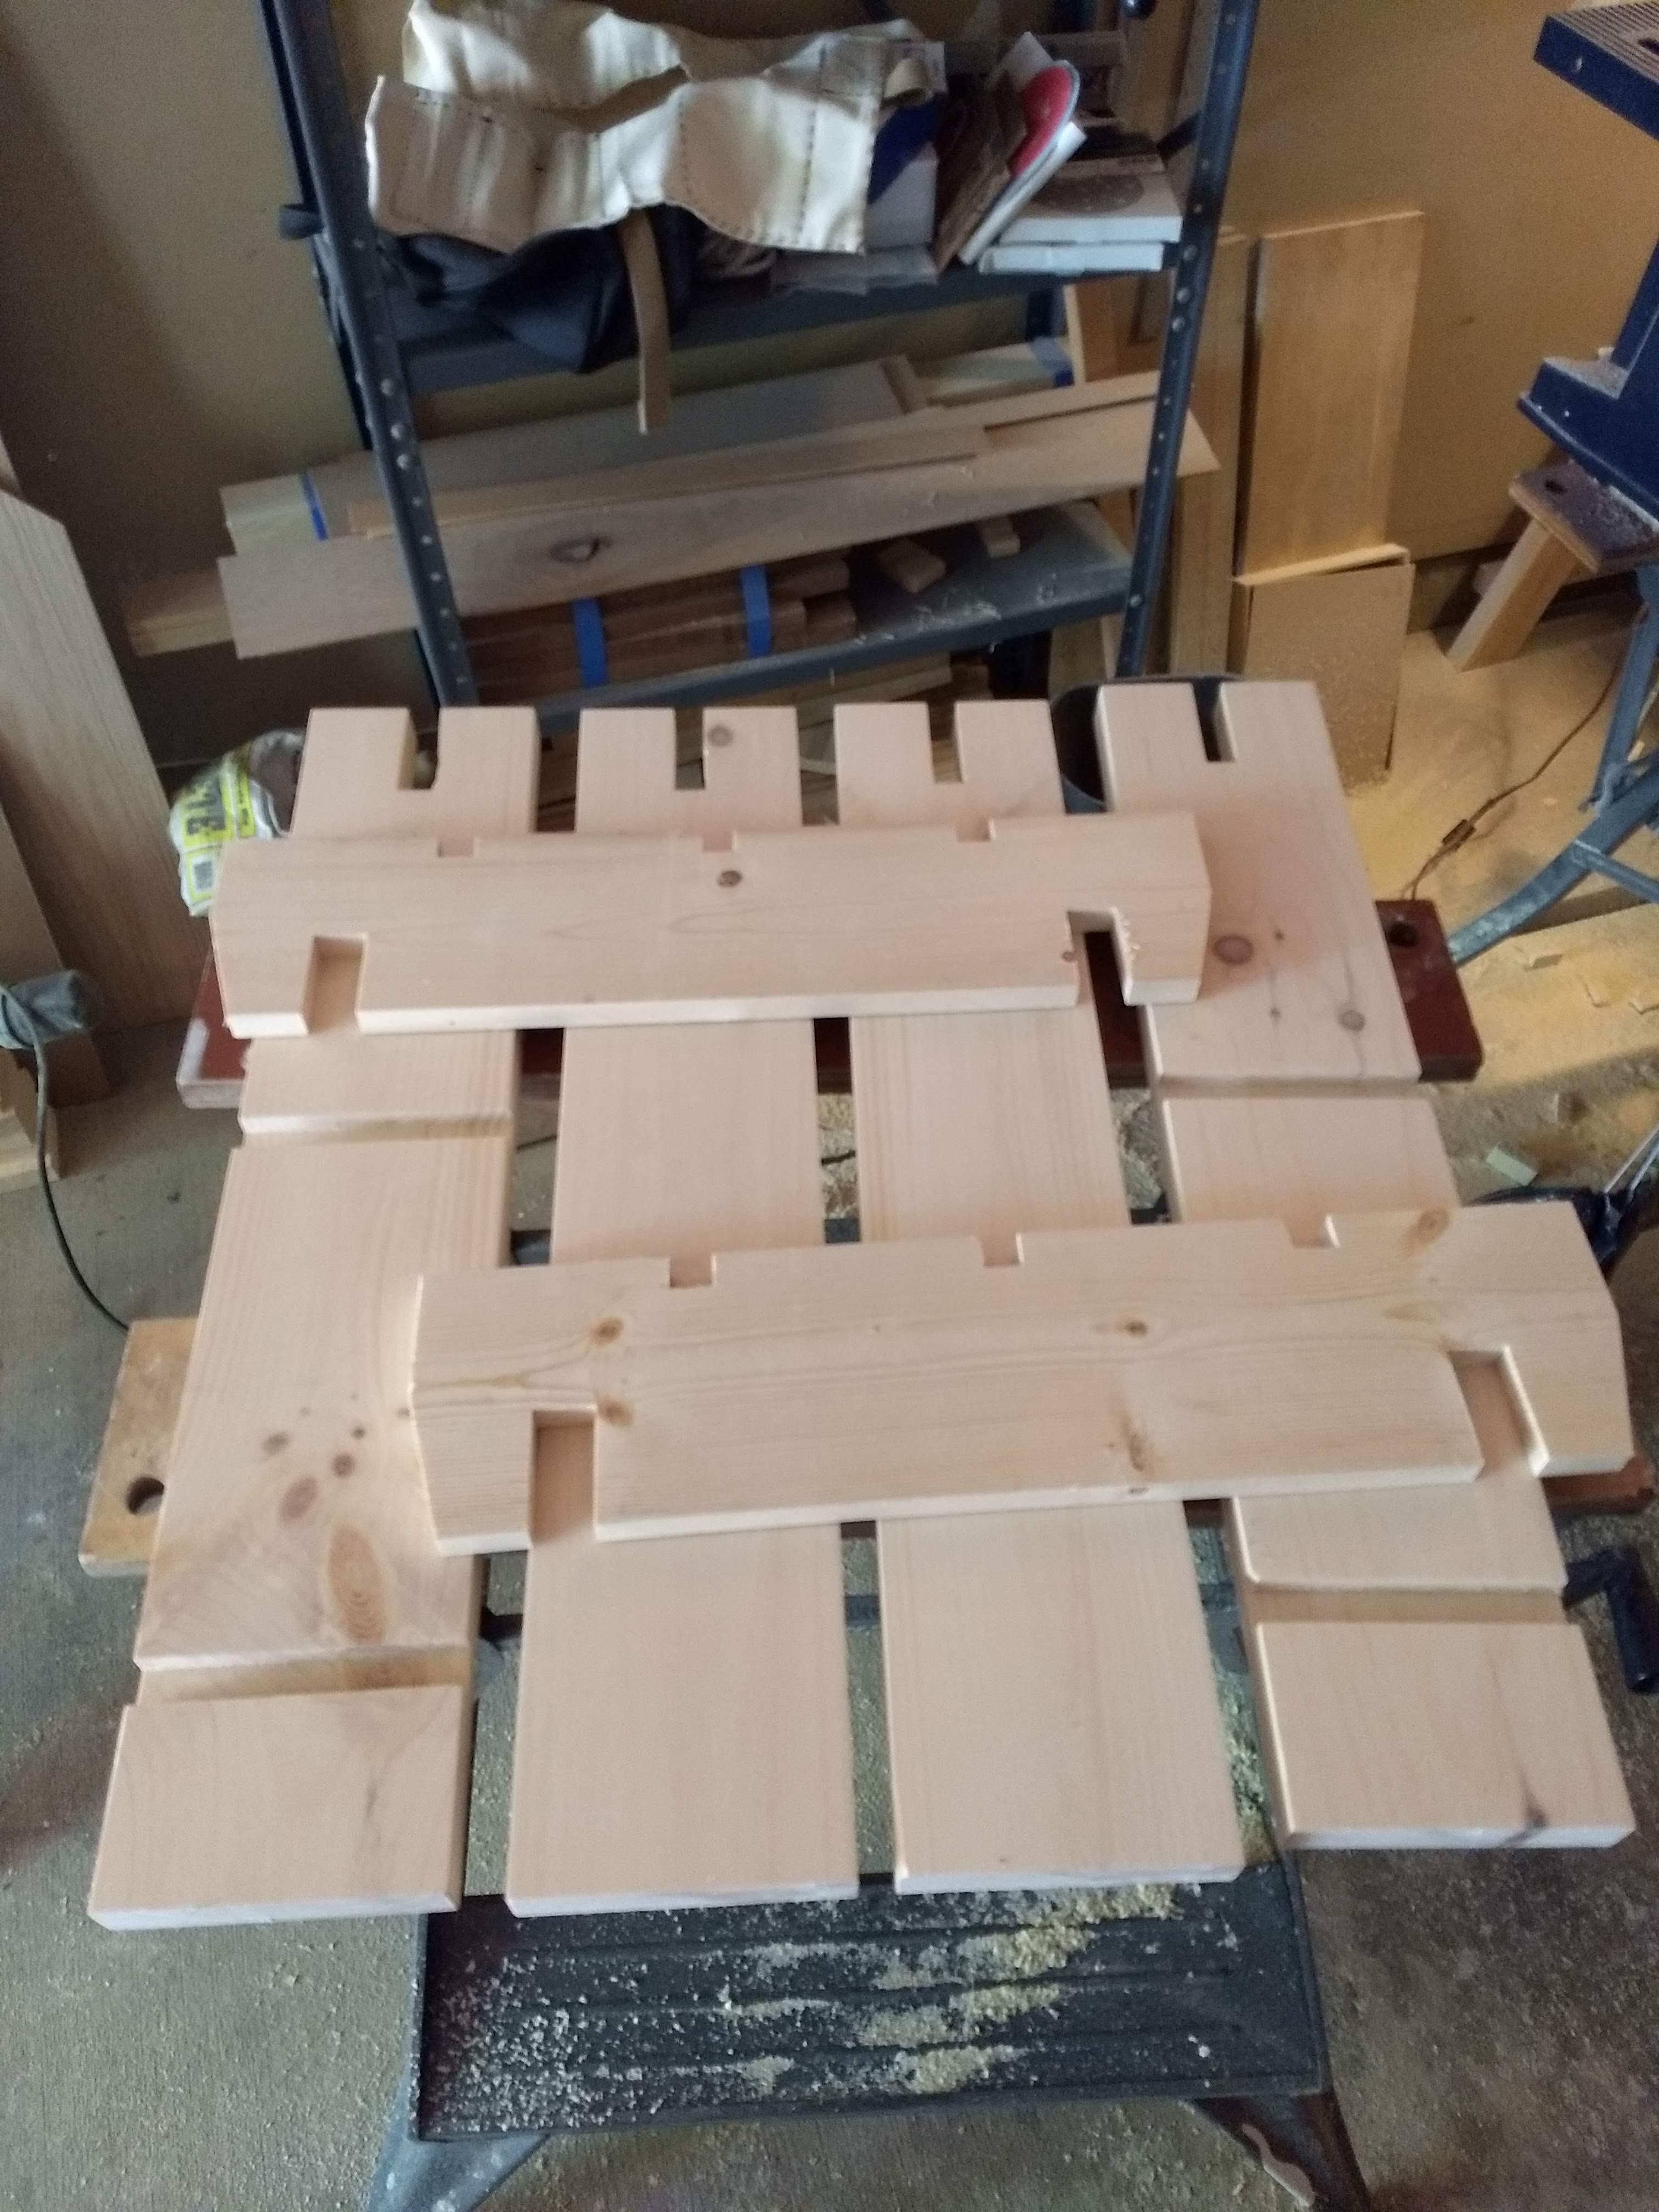
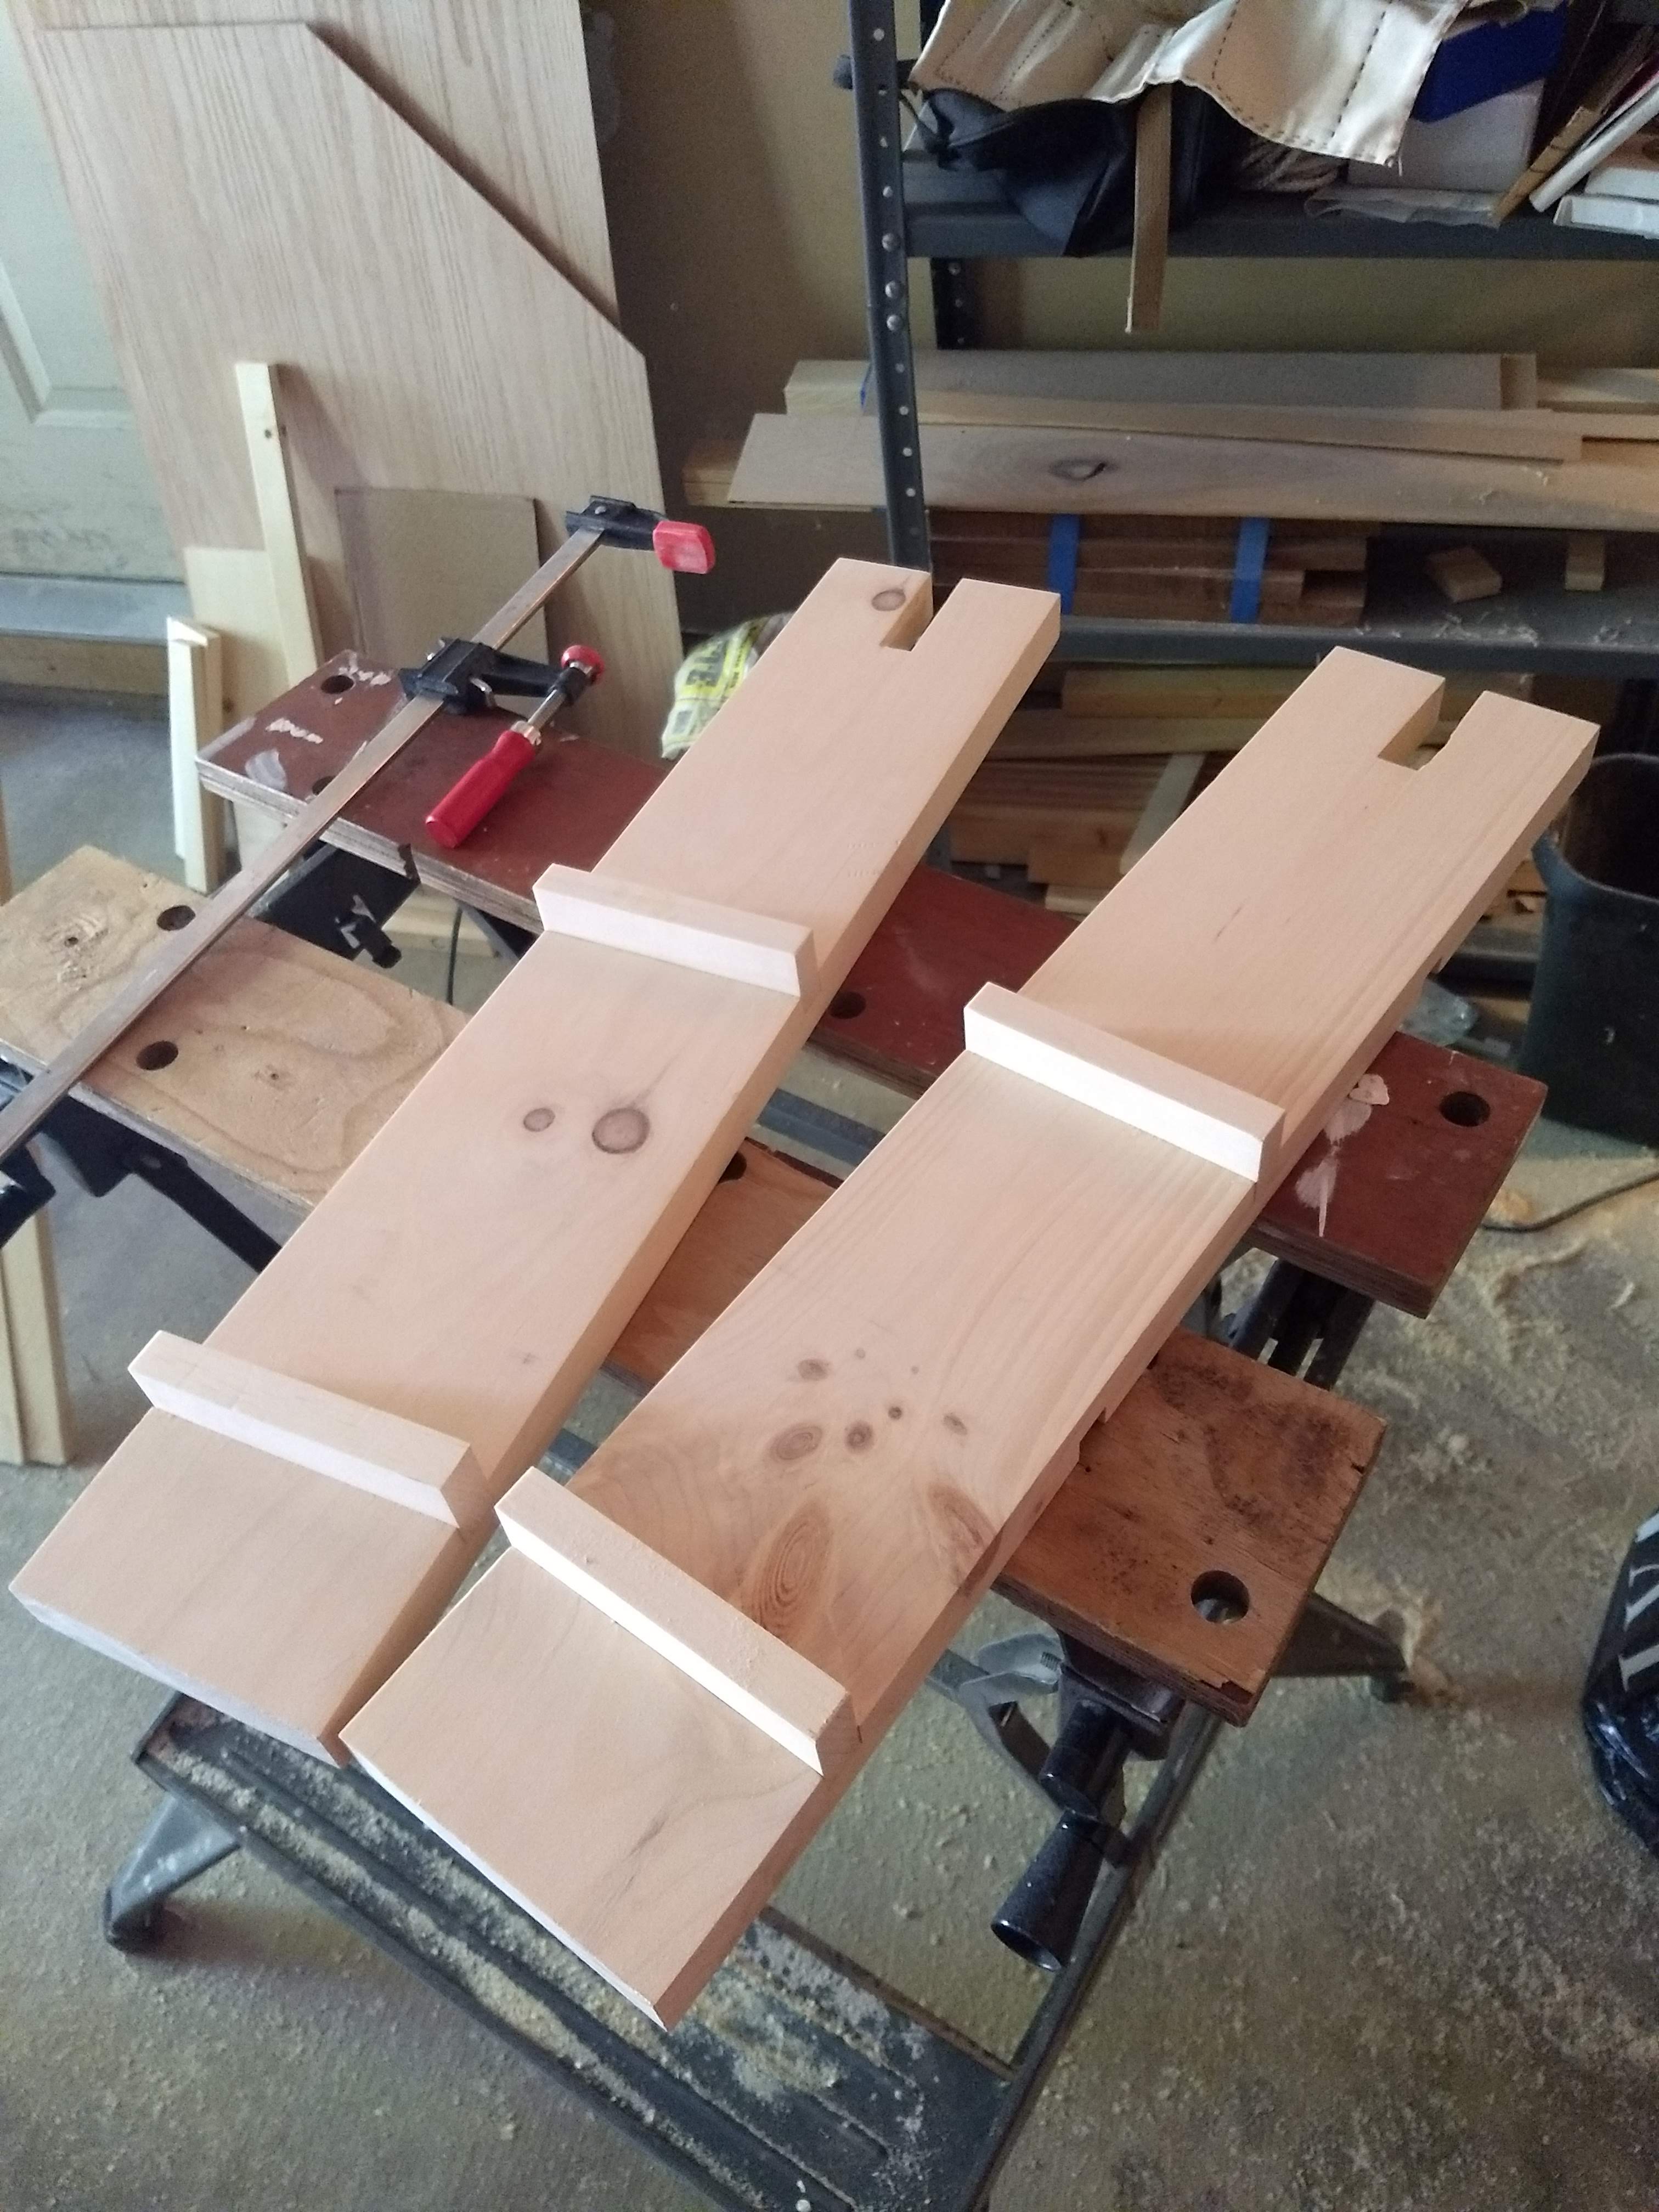
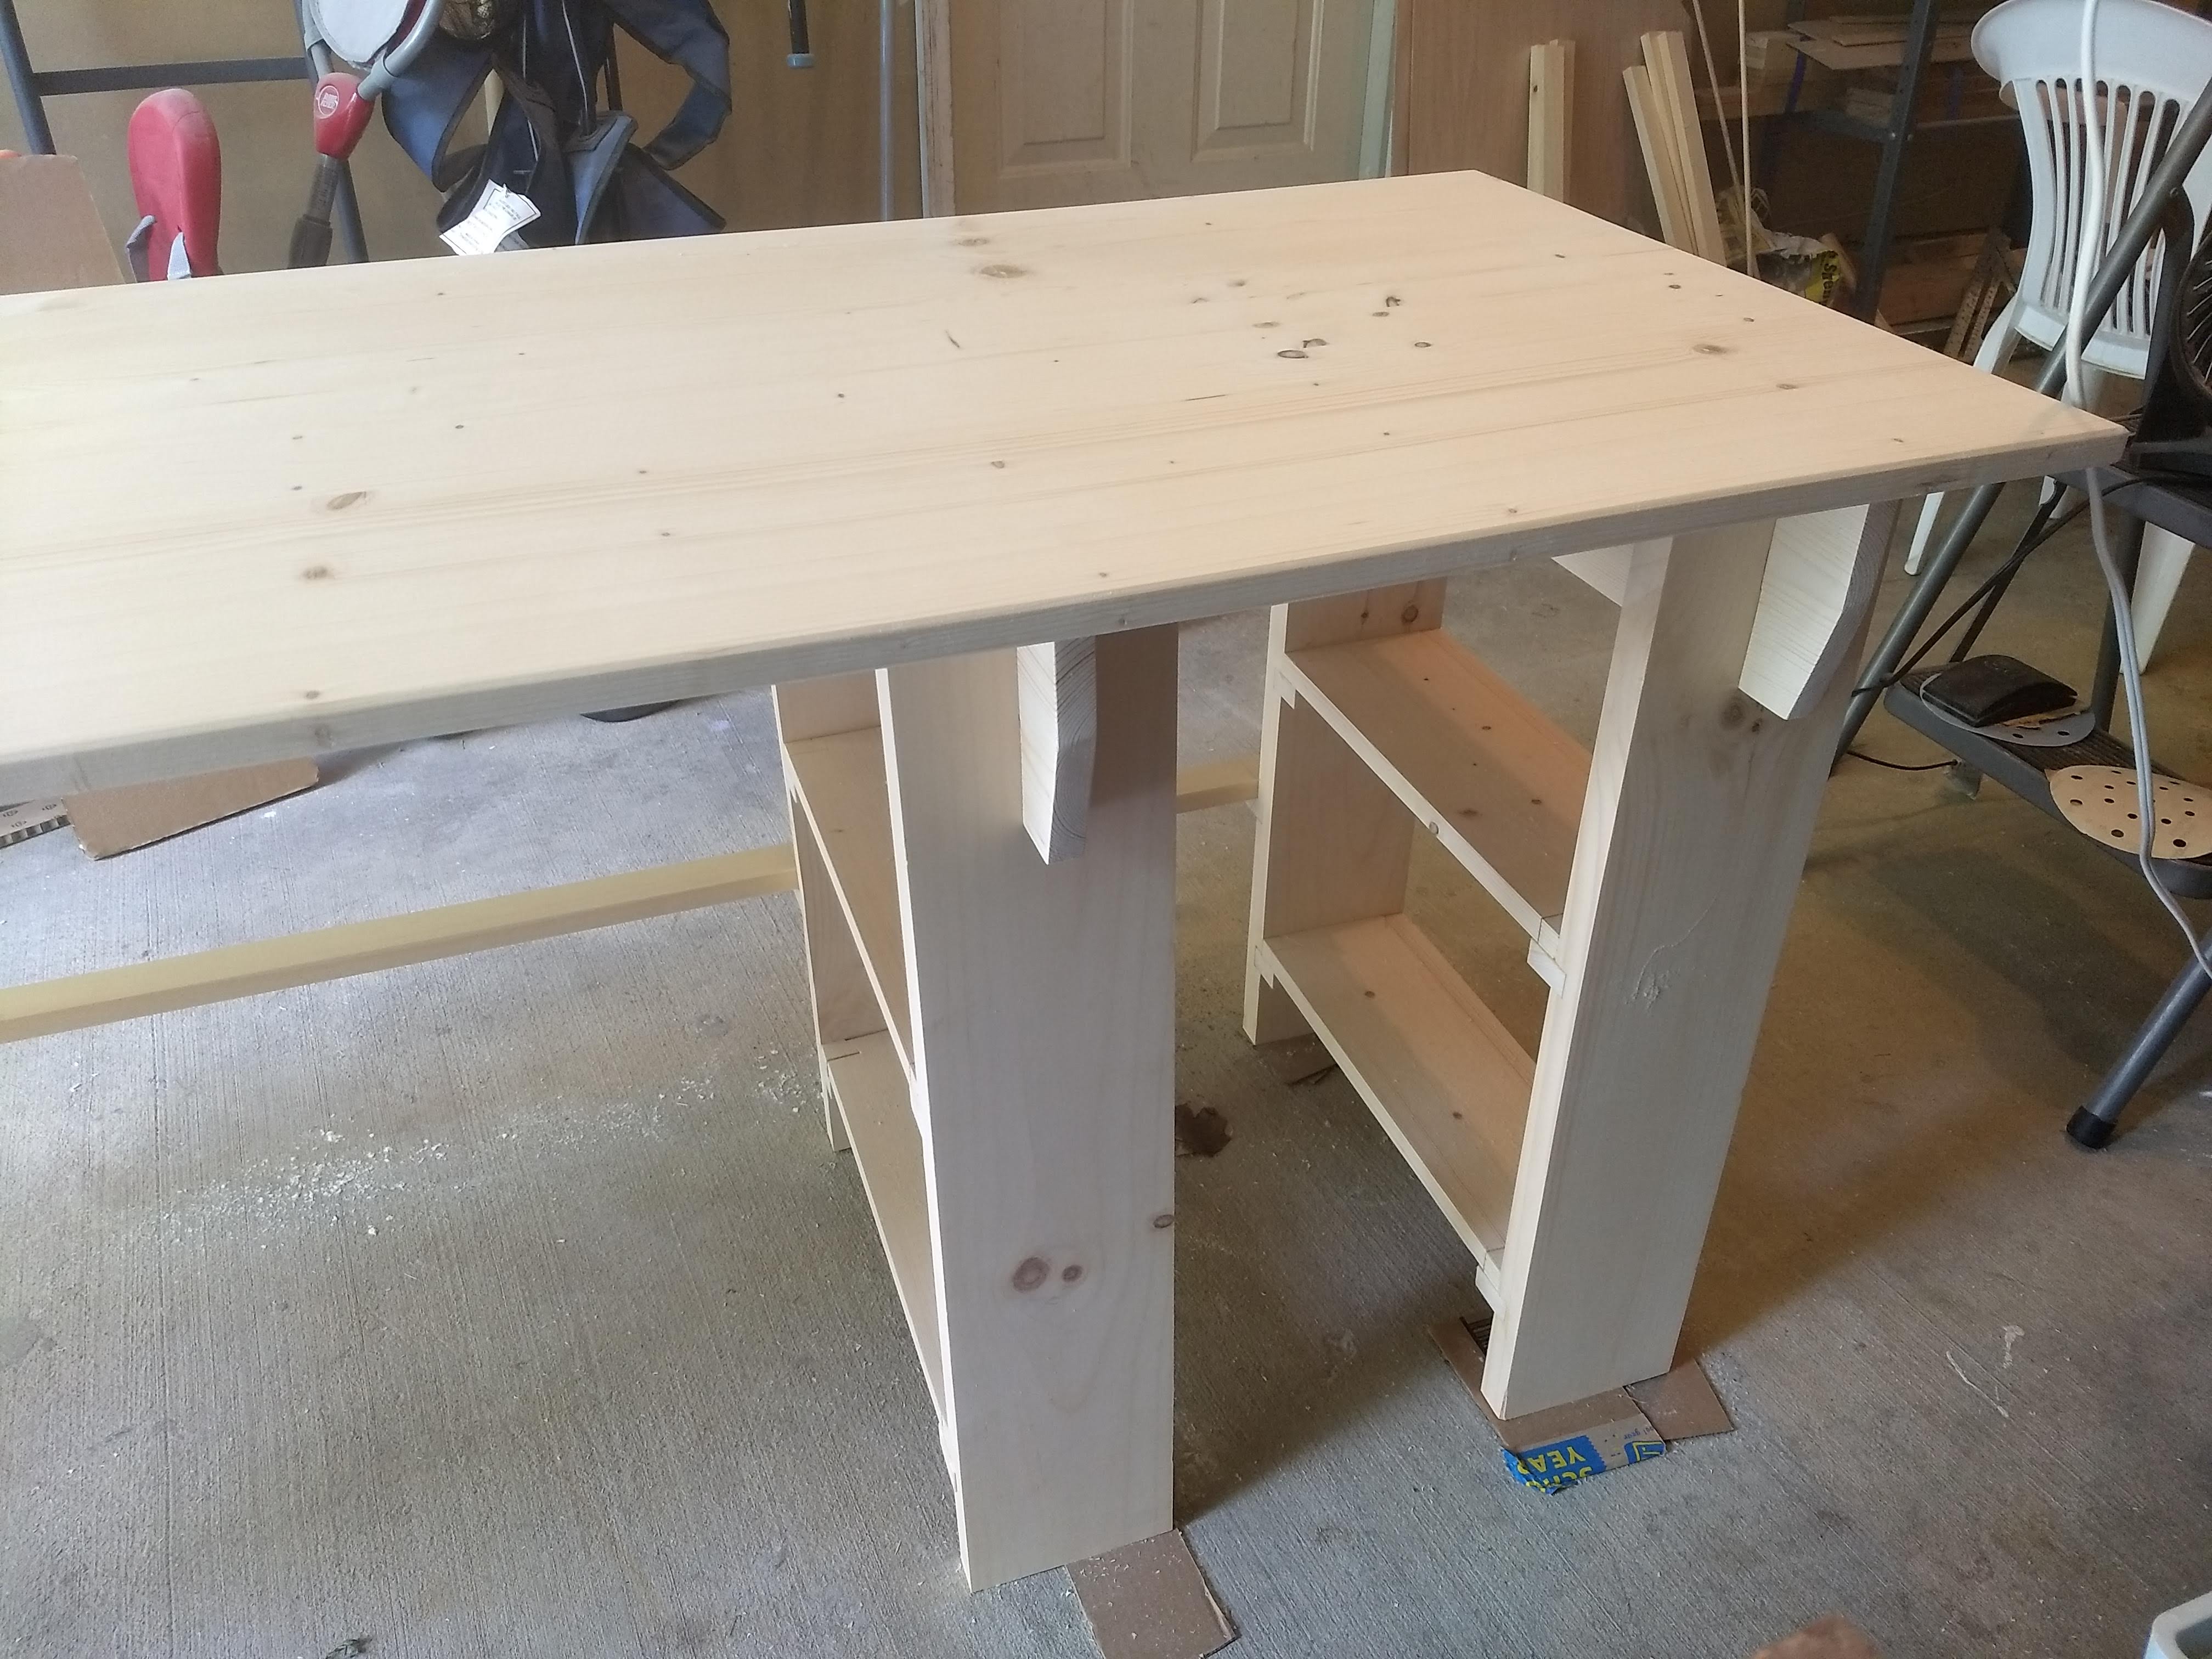
Here you can see the components of two of the three leg assemblies. The horizontal pieces have two grooves cut into their bottoms to accept the legs, and three smaller notches that will fit into stretchers mounted under the desktop. It's very difficult to see at this scale, but the outer notches are slightly wider than the central ones. The center forms a tight fit, but the outer pair are slightly wider to allow for seasonal expansion and contraction of the desk top.
The legs have a groove along their top that mates the bottom of the horizontal pieces, forming a sort of cross-lap. They also have a pair of dados on either side that will support corbel-like pieces that in turn will support shelves.
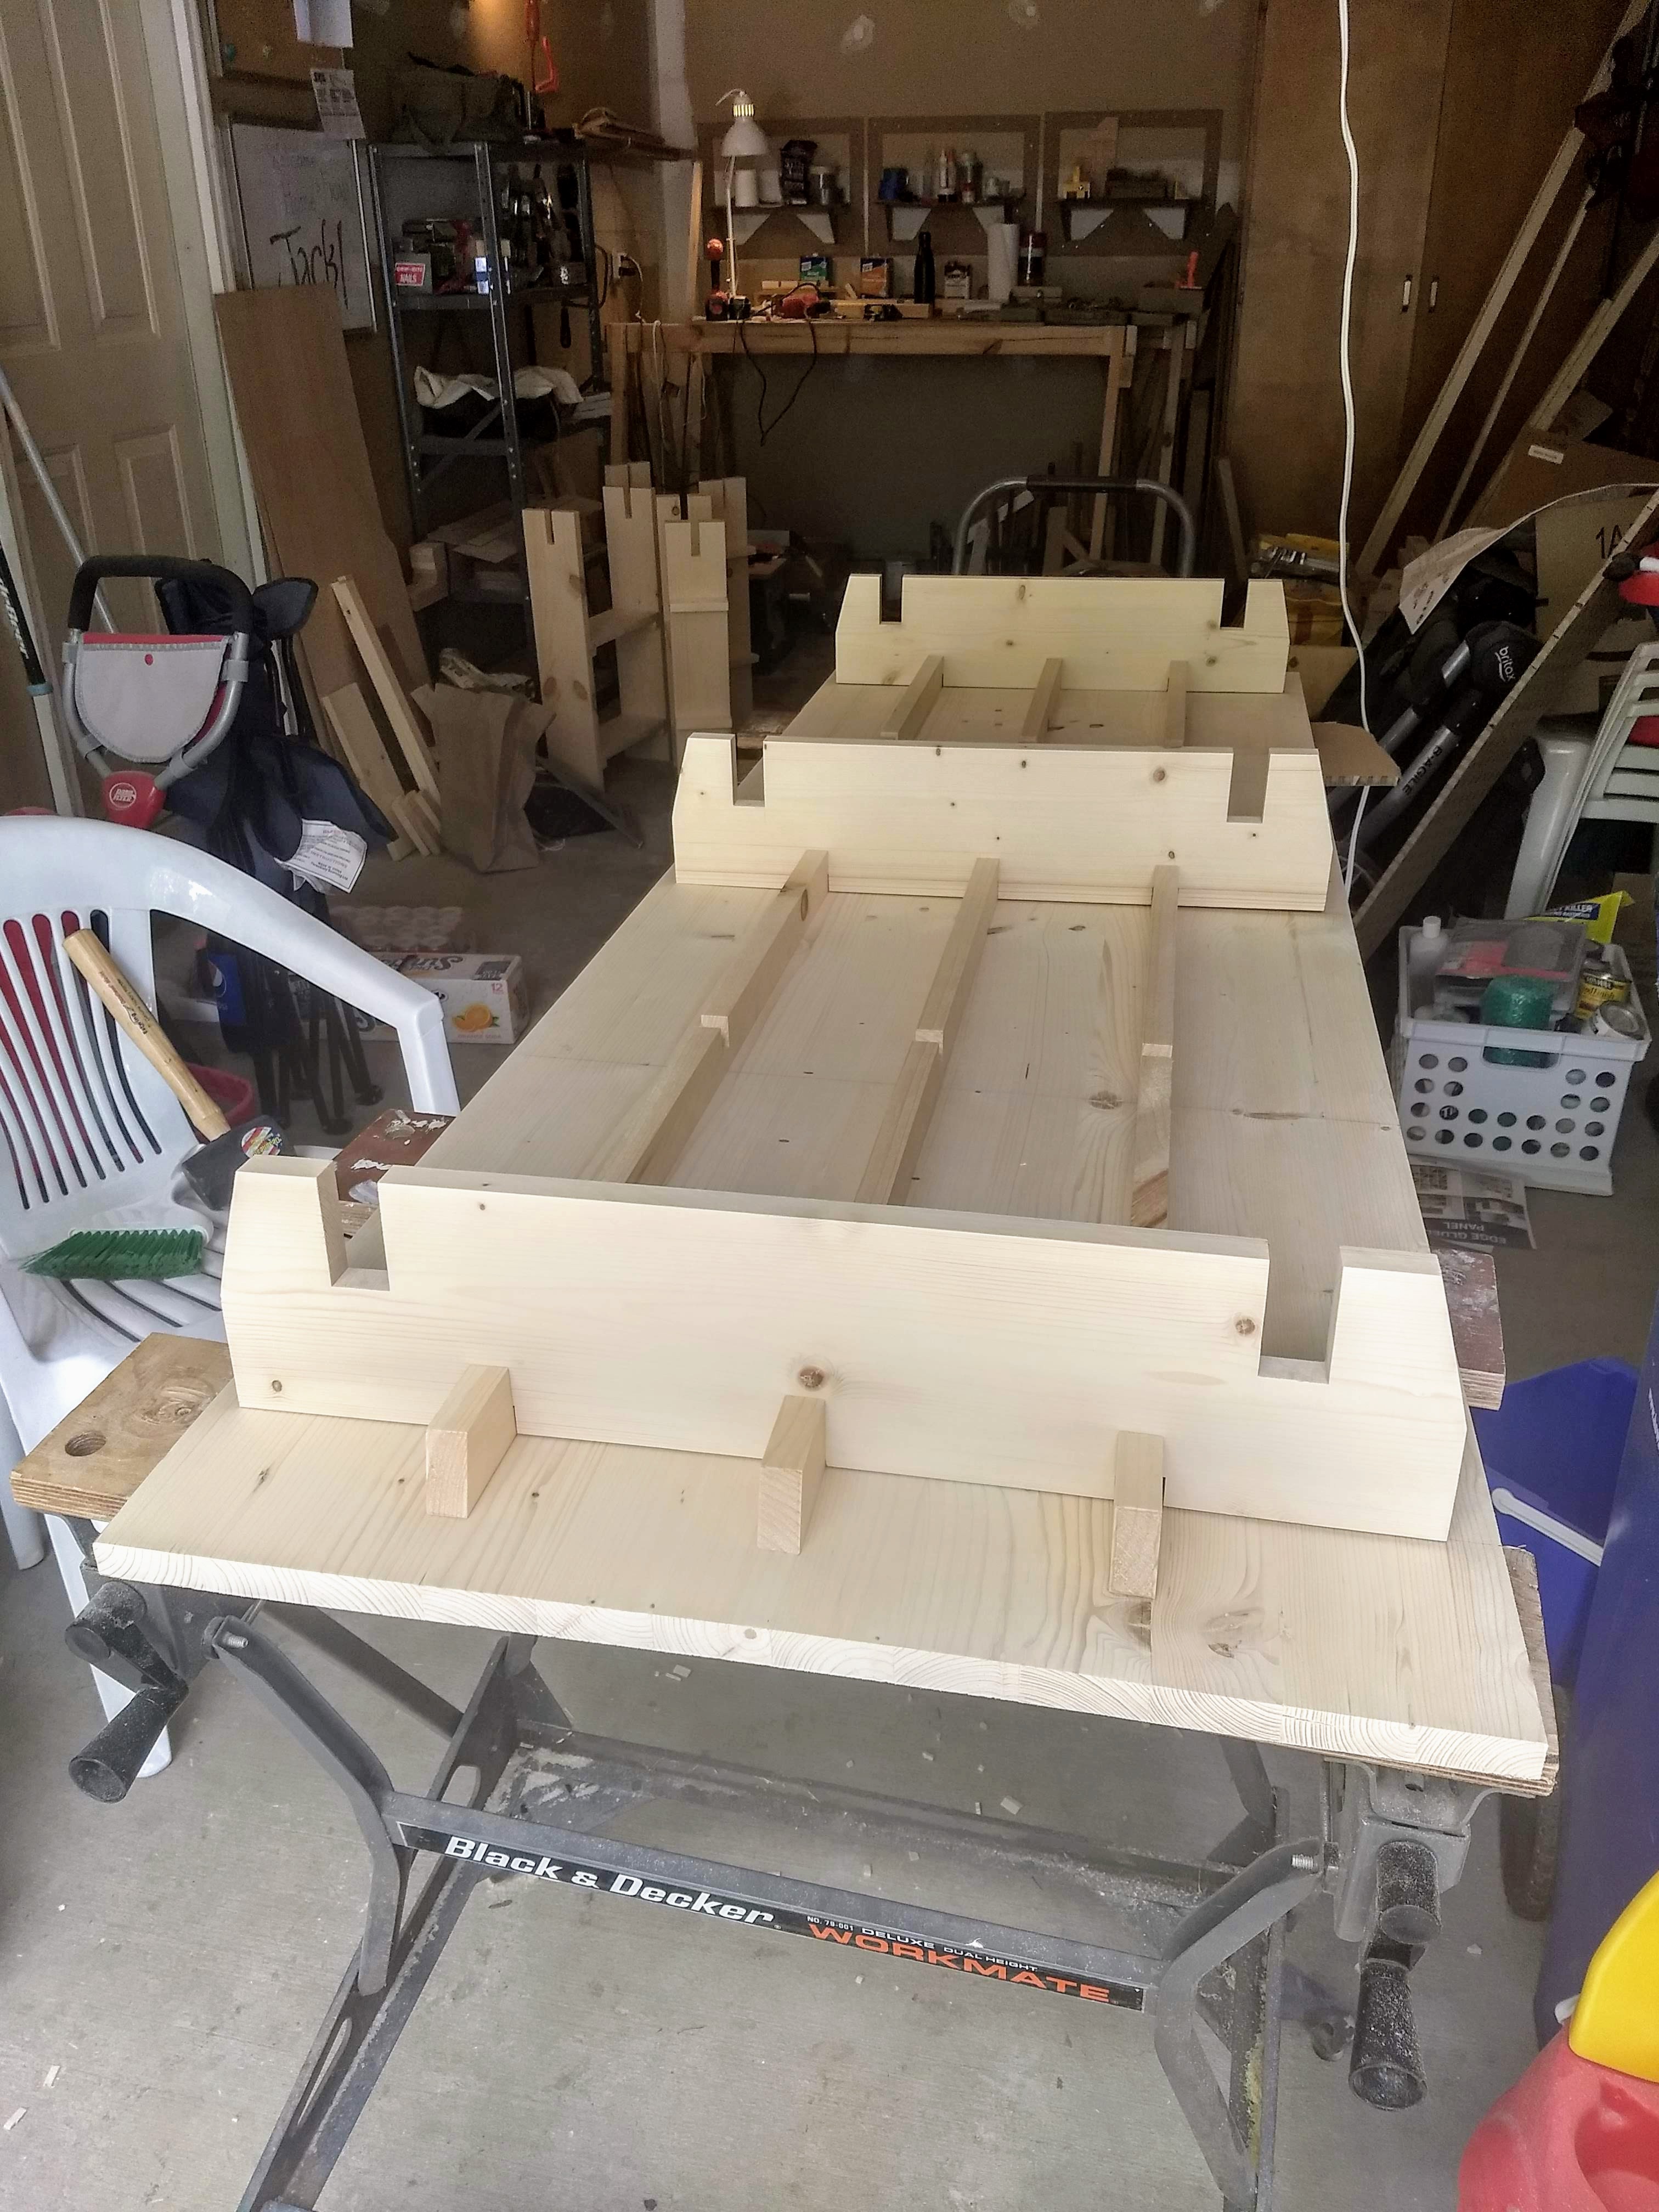
On the left are the horizontal stretchers being test fit into the underside of the desk.
On the right I have glued the corbels into the legs.
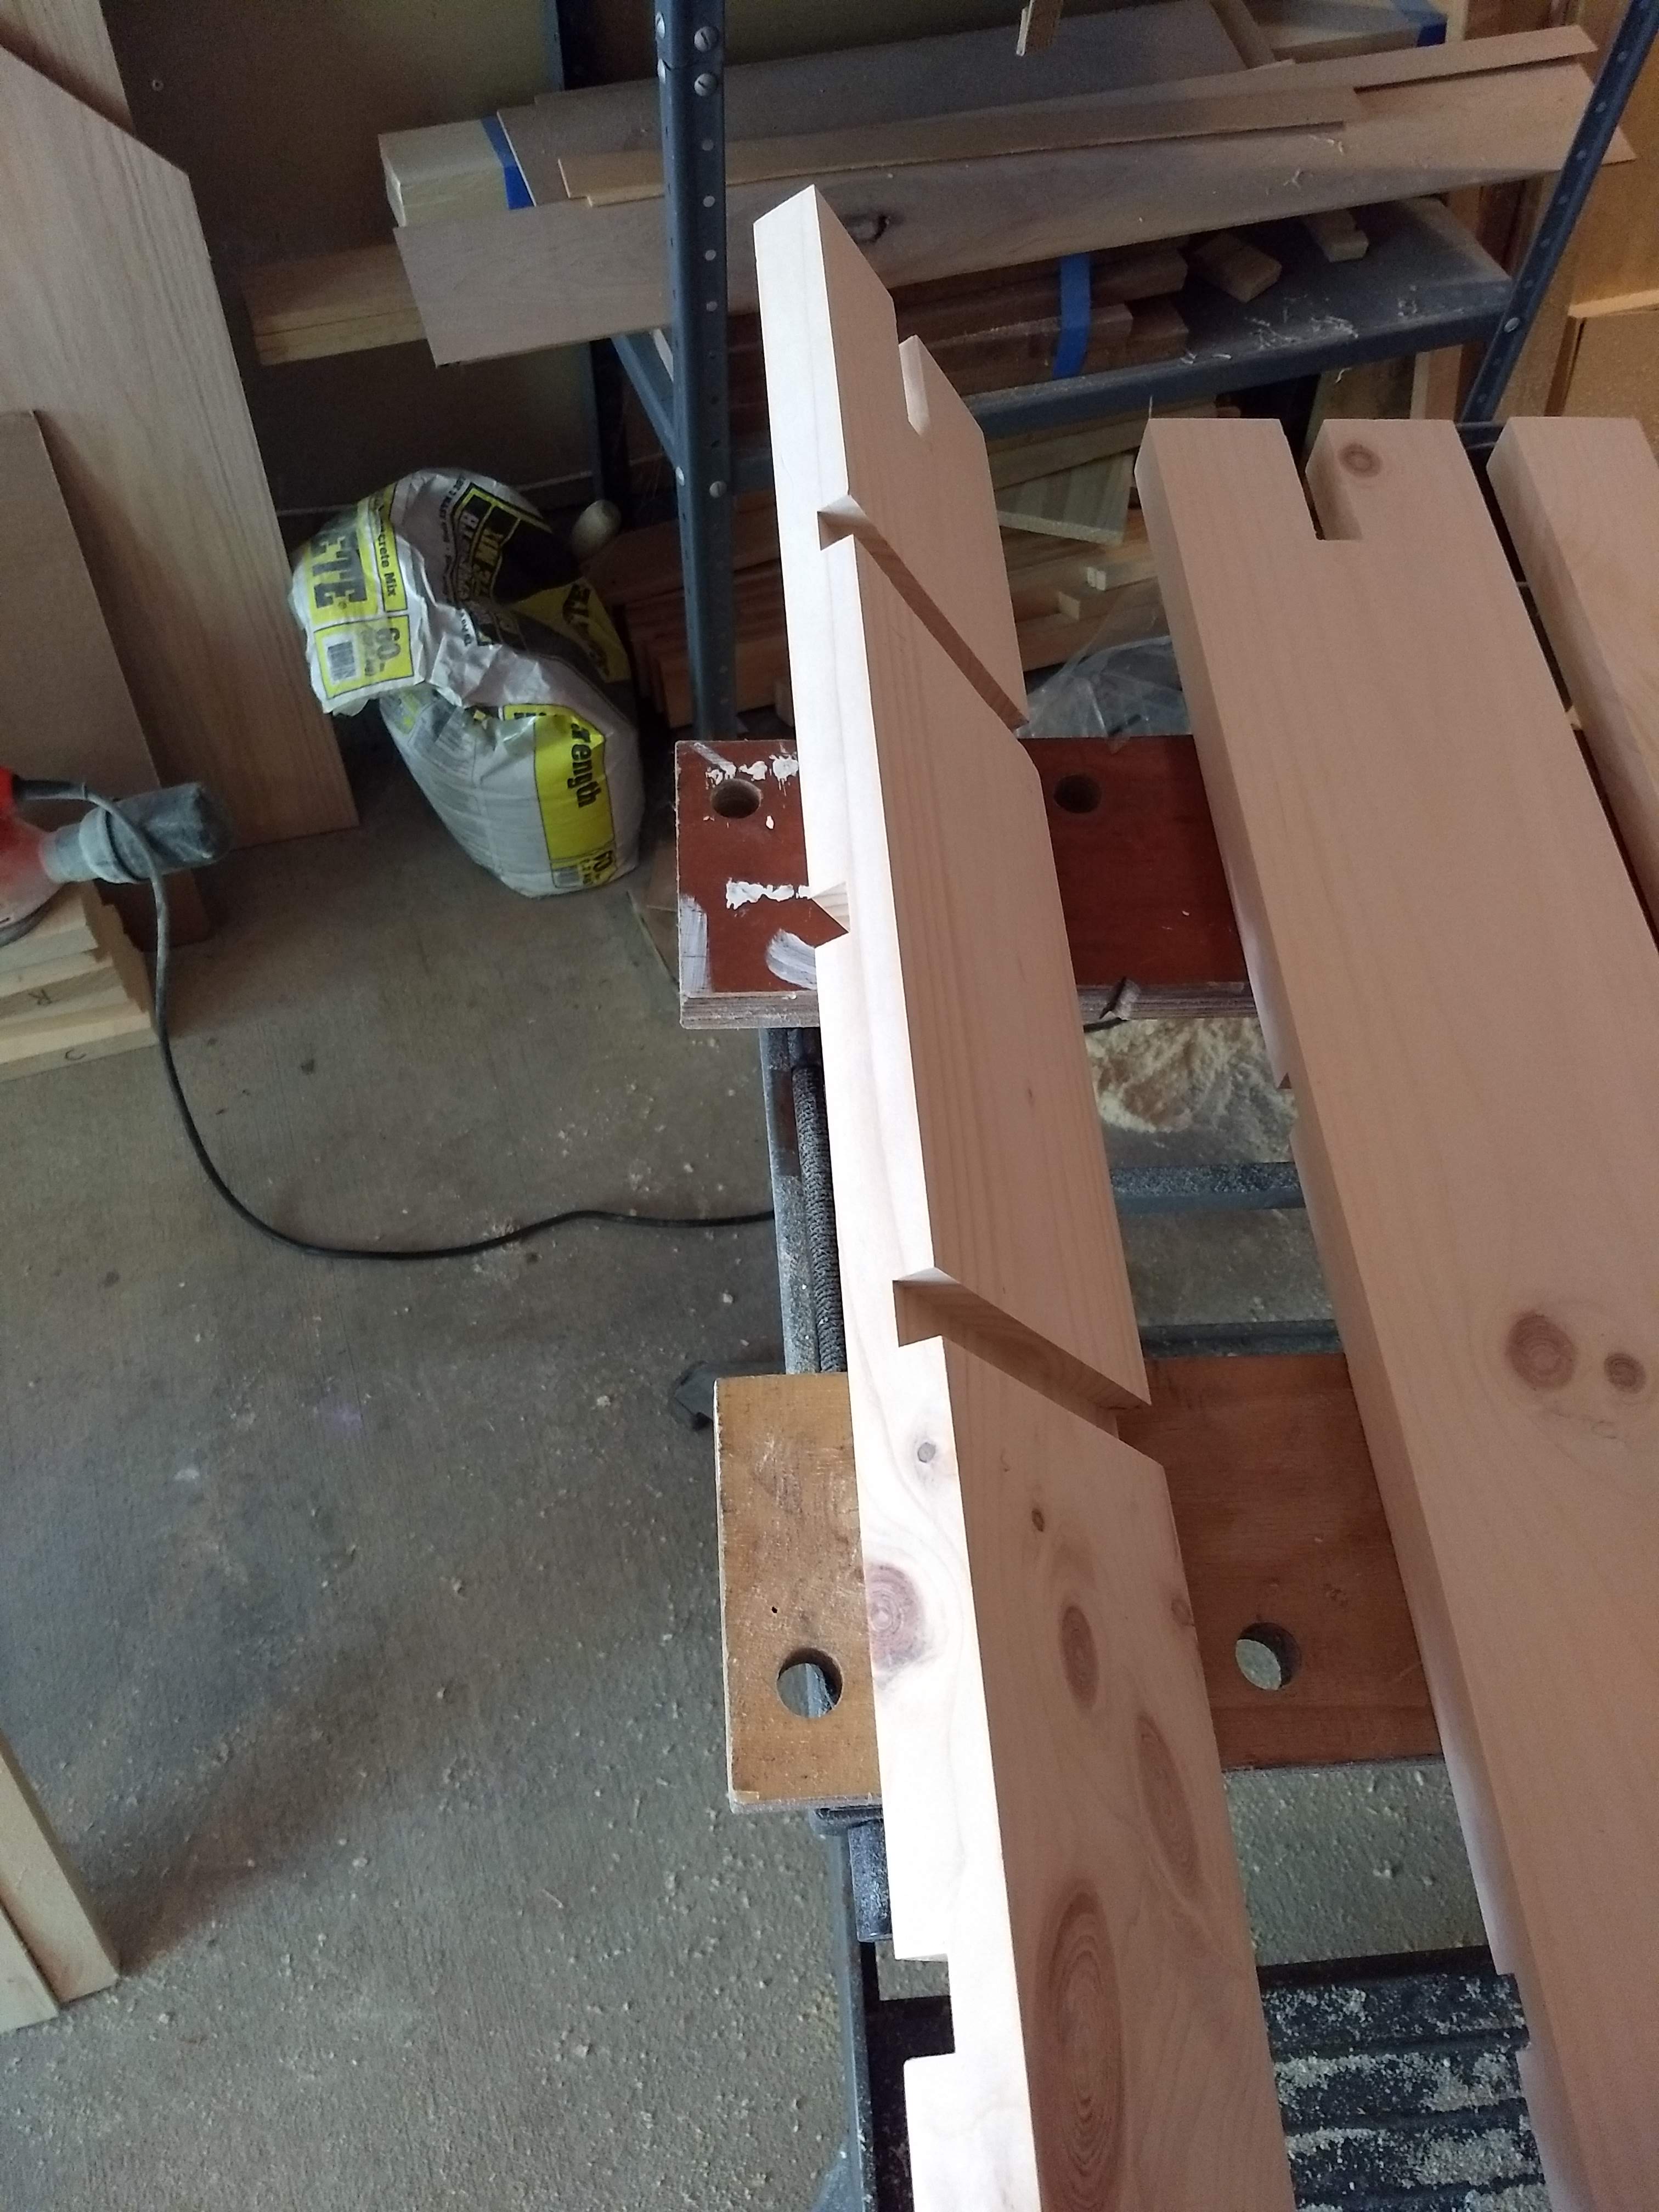
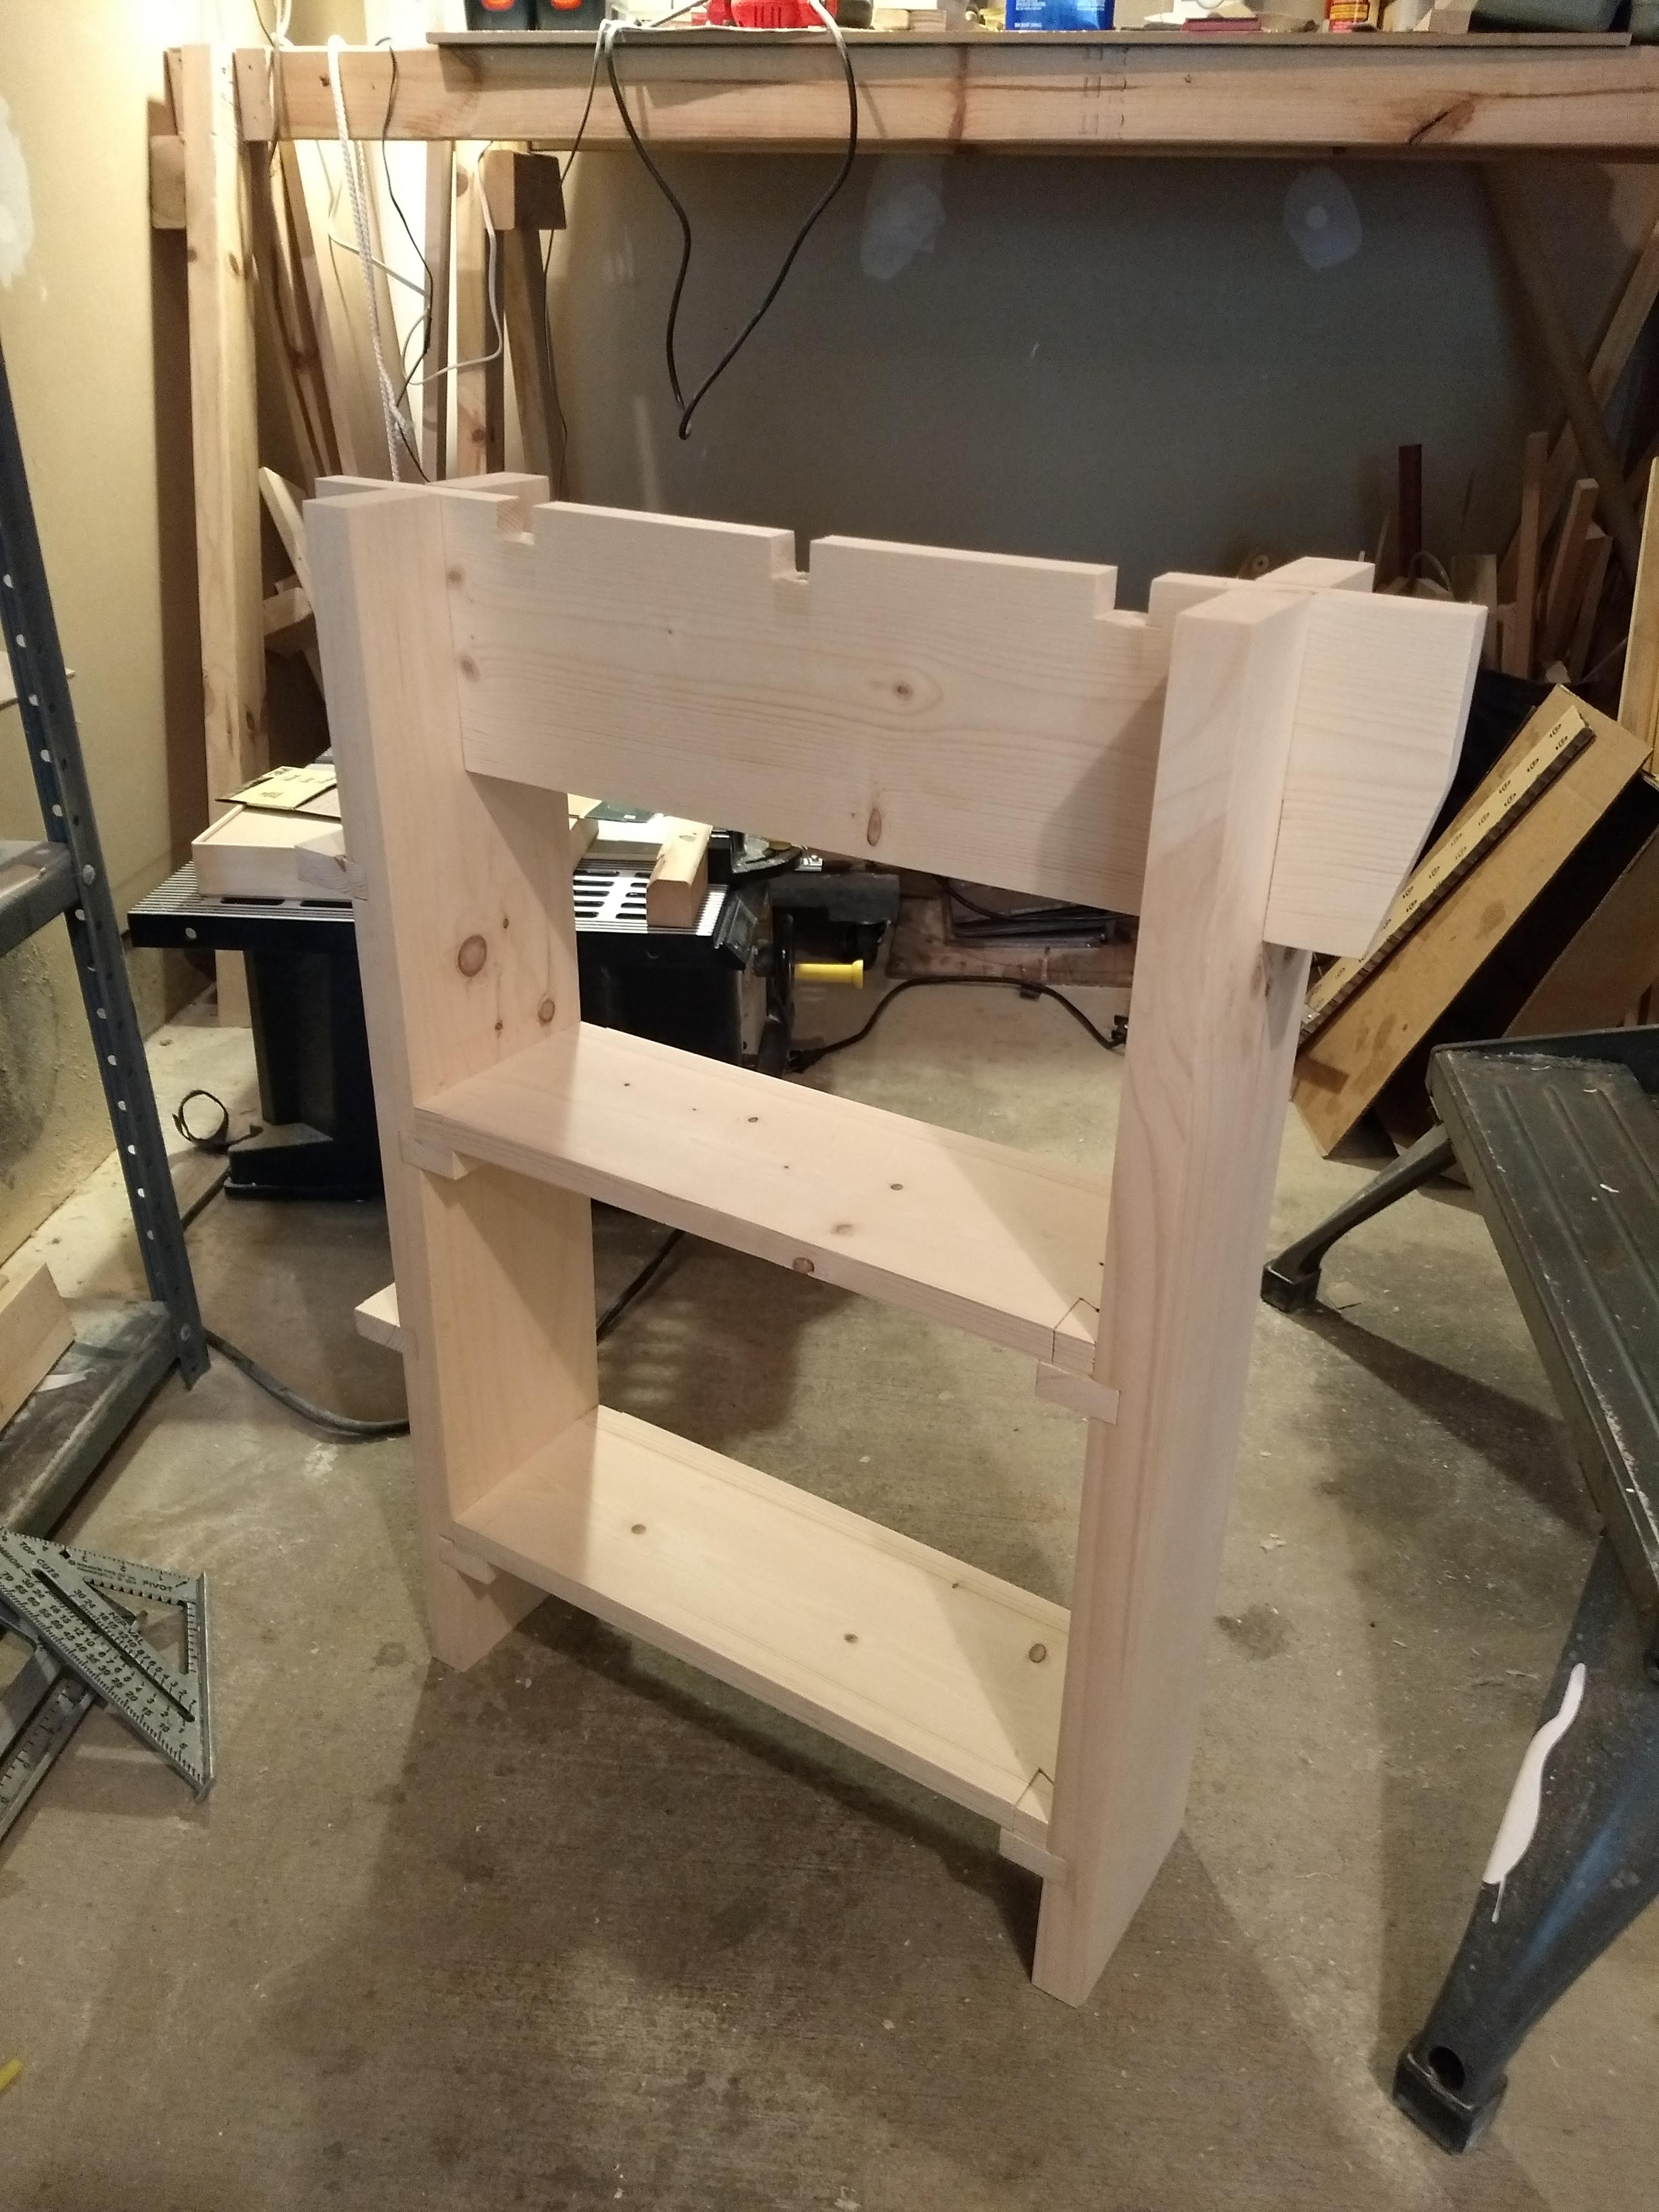
Here are close-ups of one of the leg assemblies. You can see the cross-lap used to fit the legs into the stretchers, and the dovetail-ish design that keeps the shelves on their corbels.
The half-pins were cut out of the shelf board and glued onto the corbel so that the shelf can be lifted straight up, but will not slip side-to-side. The shelf also serves to keep a pair of front and back kegs from moving toward or away from each other.
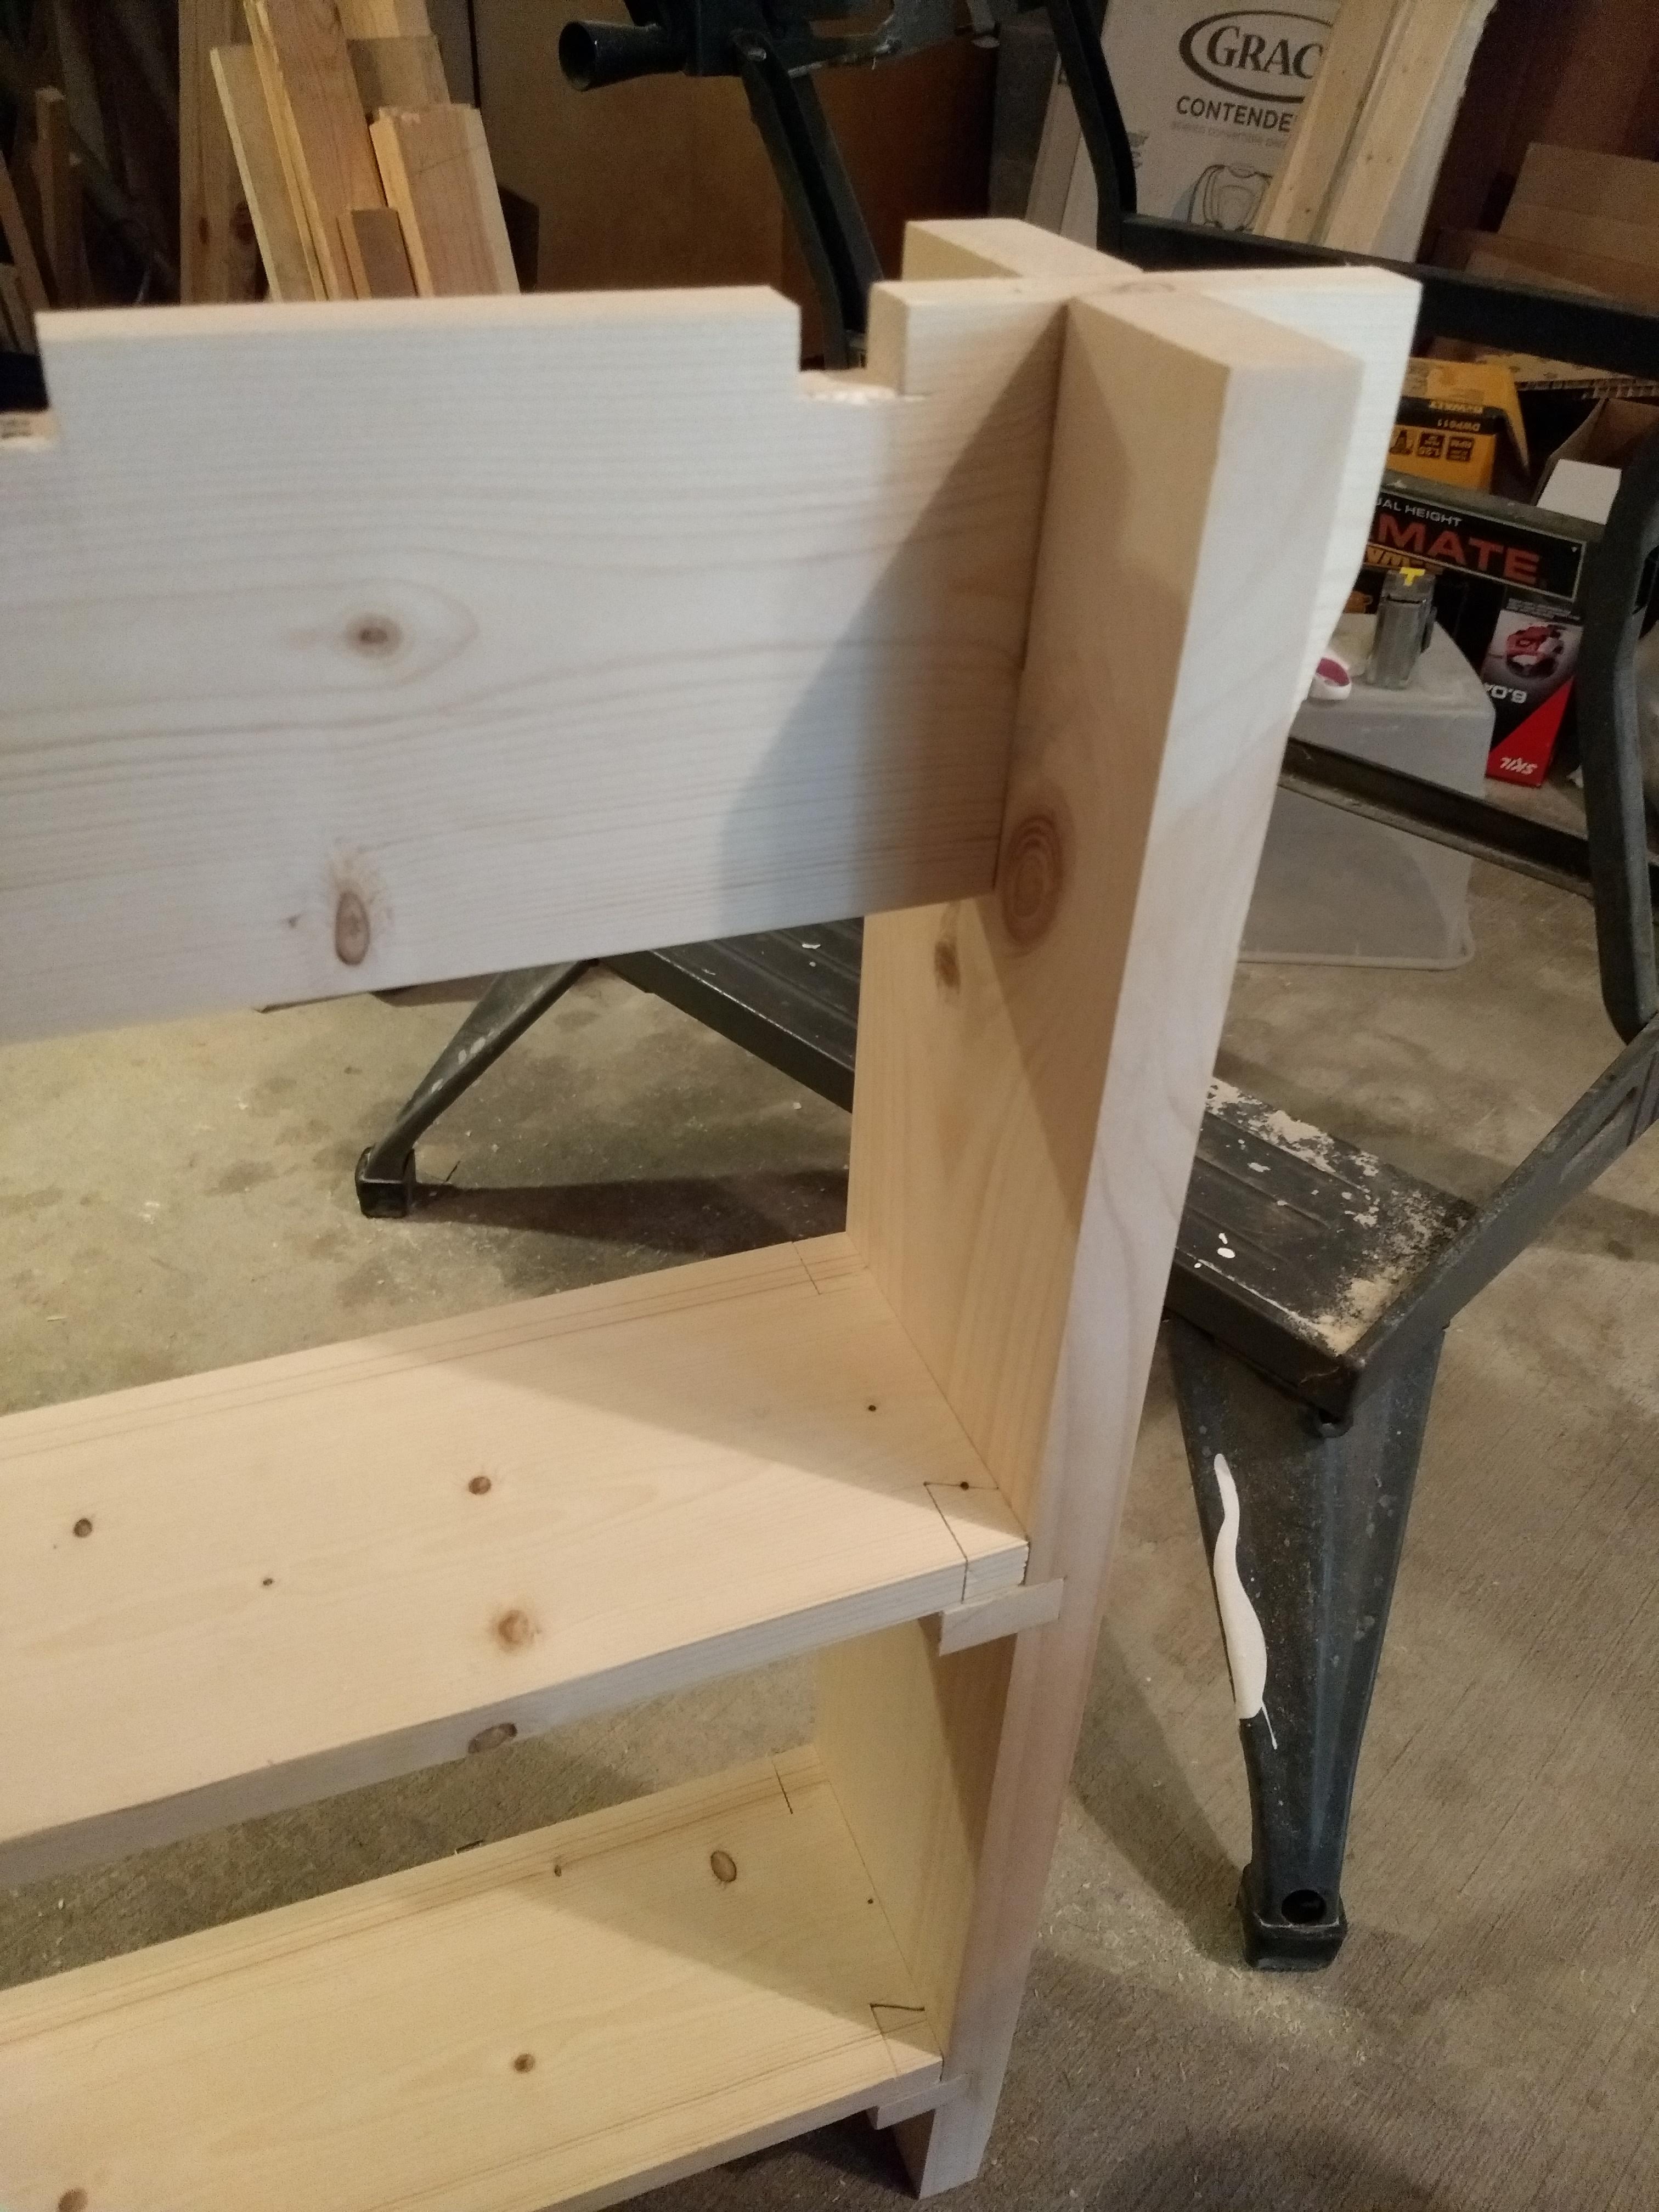
A dry fit of the whole thing. (Although I don't ever glue the components together, so every fit is a dry fit.) You can sort of see two additional stretchers in the back that help prevent everything from wracking side-to-side. Right now these are the only components held in place with metal fasteners. I need to get a new drill bit that will allow me to replace those screws with wooden pegs.
The stretcher bars in the back also help with cable management.
I did make one change after the test assembly, which was to cut some chamfers into the front legs that match those that I put around the edge of the desktop.
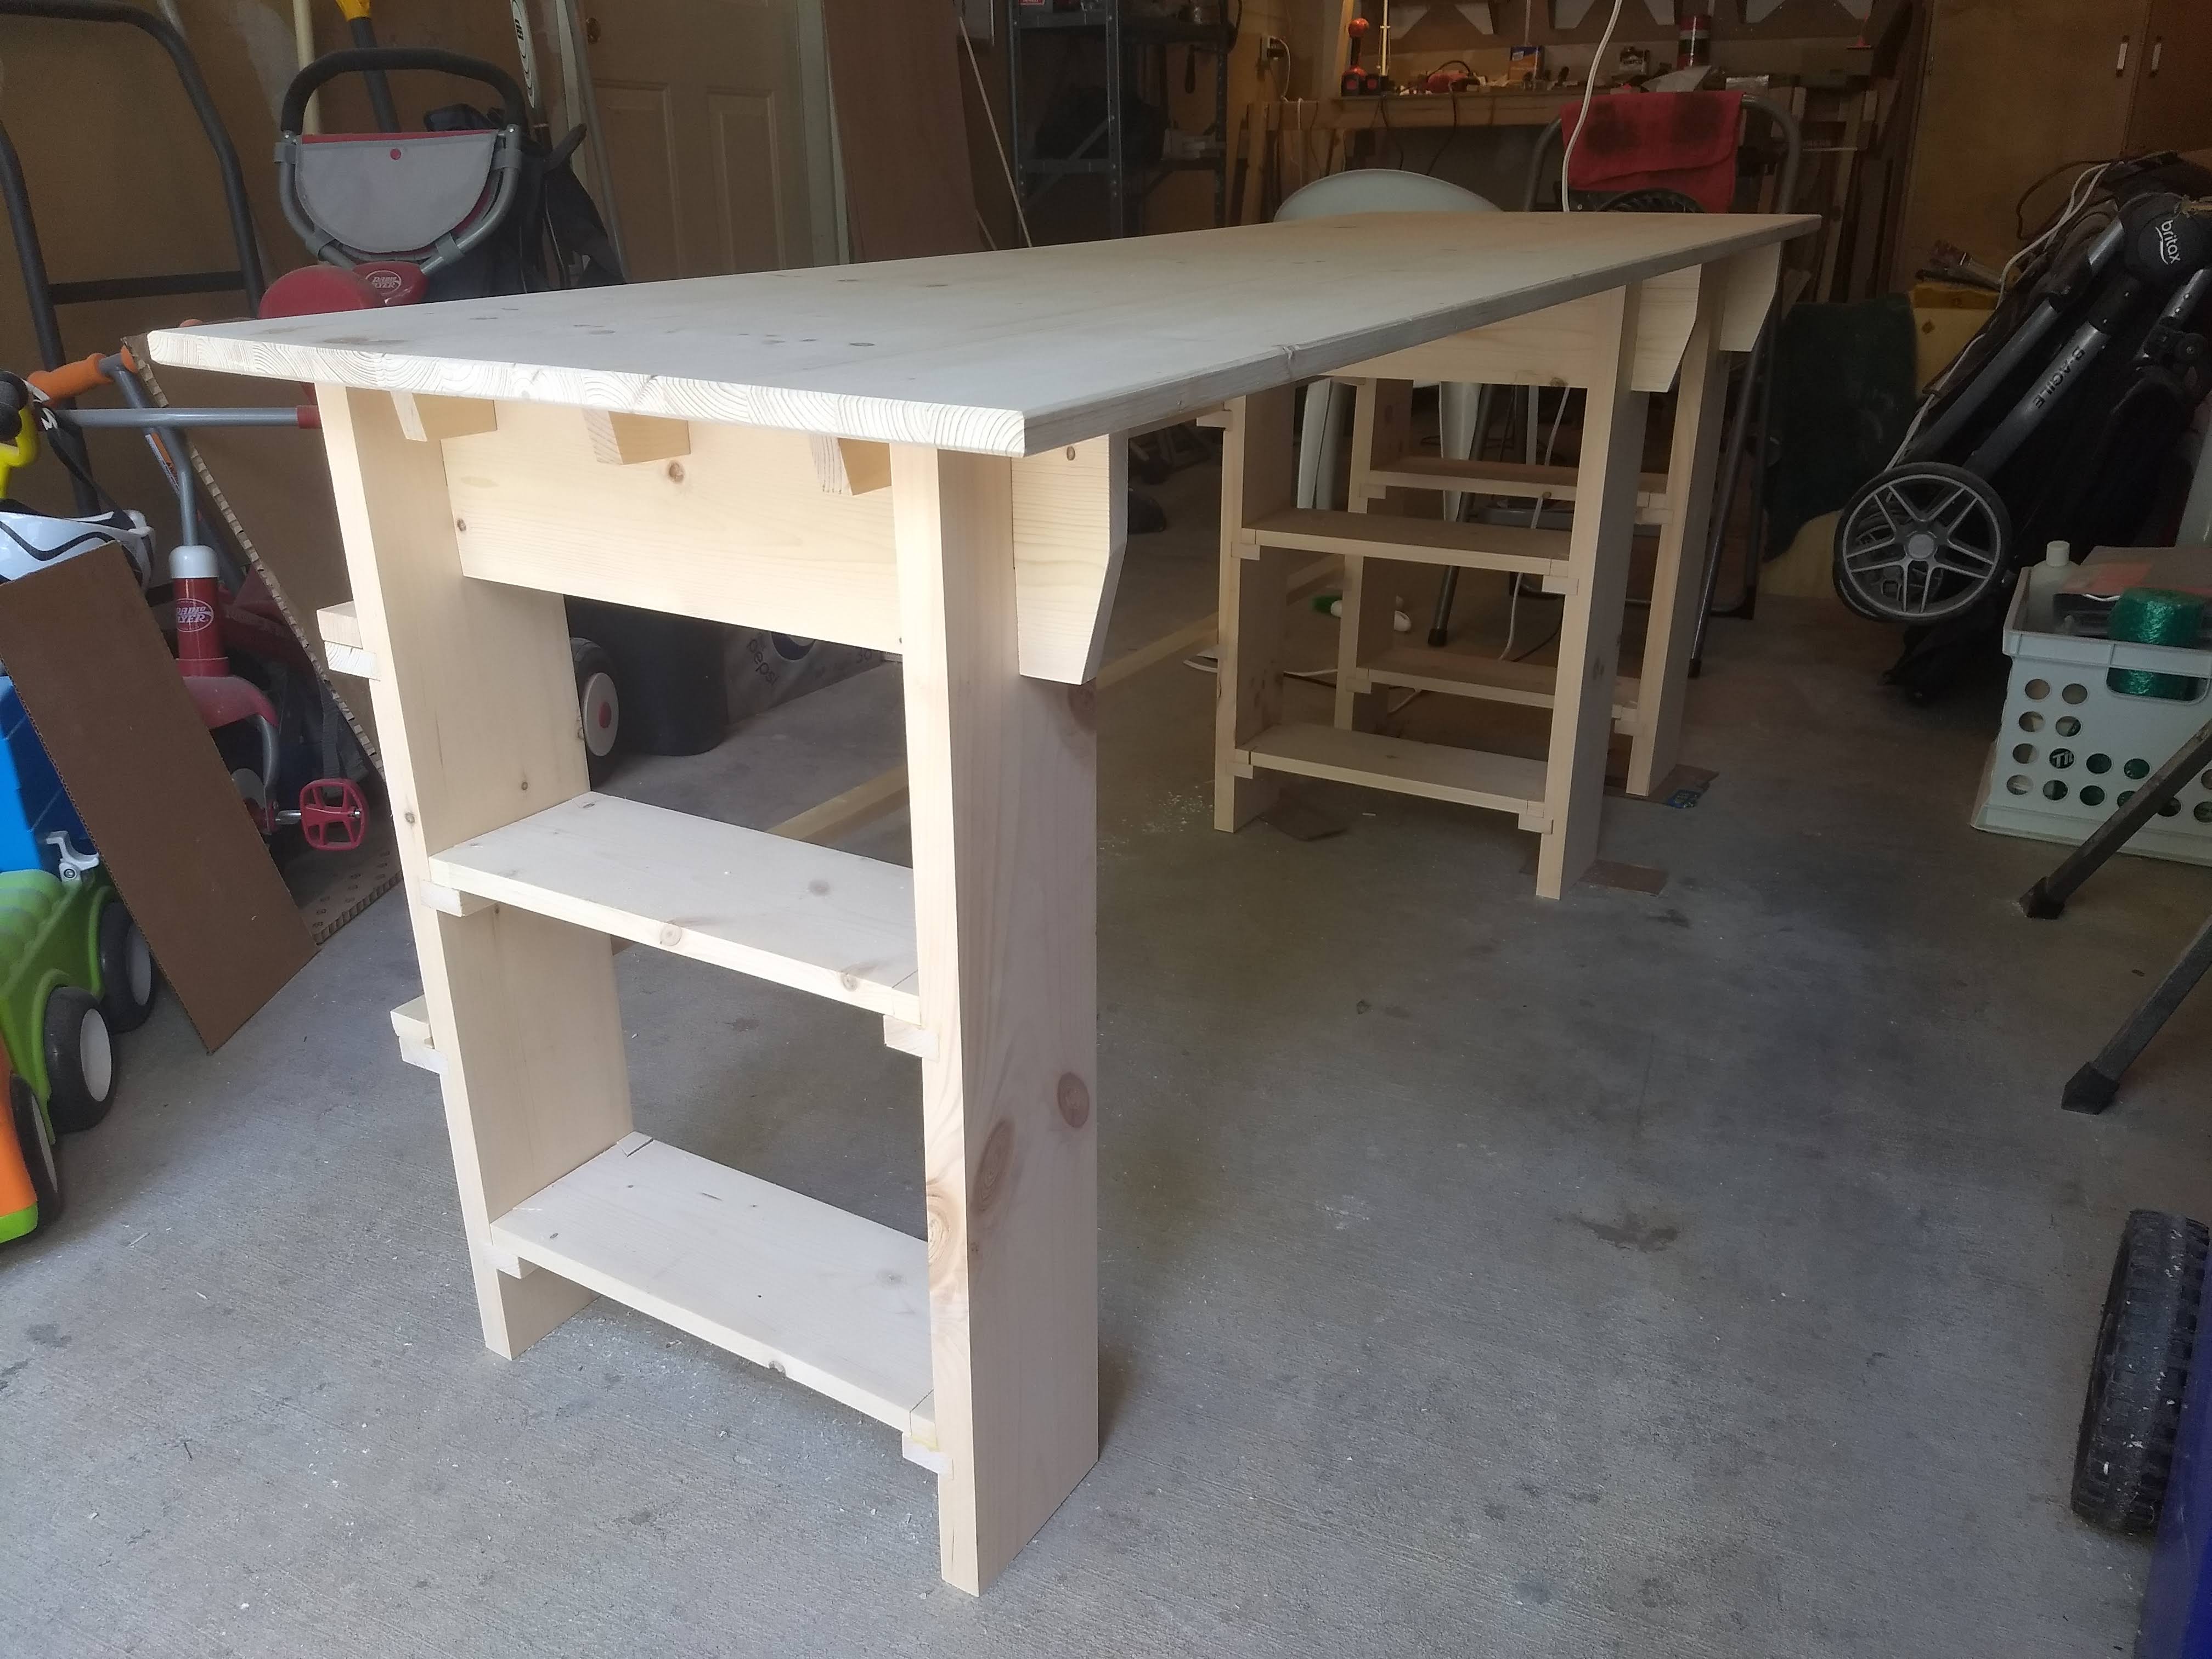
The center pair of legs is offset to the right. I don't think these legs are actually necessary, but it provides a little more support over the six foot span of the desk. Putting it off to one side allows me to have a wide area to swivel back and forth between laptop, notepads, print-outs and books. The space between the central and right leg was sized to fit a desktop computer, but until I get my old one up and running again I'll use that nook for a trash can, place to stash my bag when I come home, etc.
I cut the appropriate slots into the desktop stretchers so that the central leg can be placed in the middle or offset to the left as well, if I decide to move it.
One more look at the final thing. I'm not crazy with how the finish — a few coats of boiled linseed oil — came out, but it was cheap, which is keeping with the spirit of the project, and there's only so good you can get this construction-grade pine and spruce to look. Plus it reminds me of the yellow-ish pine furniture I had growing up. I remember stairing at my bed frame and wondering how you could turn a tree into that. I guess now I know.

Overall I'm happy with how this turned out. Of course as soon as I finished I got the desire to immediately start building a new one to take into account everything I had learned building this one and to correct the mistakes I made. I'm going to take Jonathan Katz-Moses' advice and not dwell on those mistakes. At the end of the day, I now get to sit down to work at a surface that I built myself, which is a good feeling. I'm chalking that as a win and moving on.